Hand-raising and care of budgerigars (Melopsittacus undulatus)
Corina Gardner
Introduction
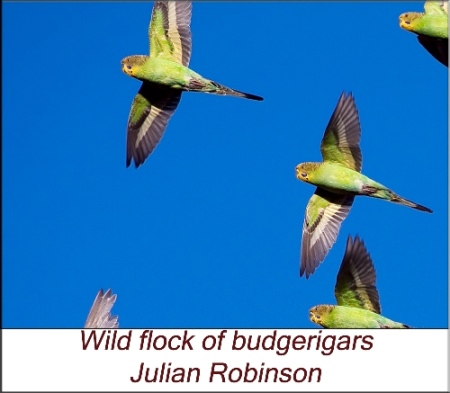
Budgerigars (Melopsittacus undulatus) or "budgies" are psittacine birds that belong to the order Psittaciformes. Budgerigars are originally from the grasslands, scrublands and open woodlands of Australia, and were first recorded in 1805. These little seed eating birds live in large flocks in Australia and feed on native grasses like Spiniflex, Mitchell's and Tussock, and plants such as Saltbush (Orache) and Tar vine (Red spiderling). They will also readily consume wheat and wild millet. They usually forage on the ground for food. In their natural habitat budgies nest in cavities in trees and hollow tree trunks as well as logs on the ground and often choose to live near bodies of water.
Captive bred budgerigars are found in an array of beautiful colors. These low-maintenance, lively birds make popular pets as they are very easy to tame, very energetic, playful, affectionate and intelligent. These little chatterboxes also make wonderful mimics. The males are more vocal than the females. They are also very social birds and enjoy the company of humans, in fact, people in the house inevitably become the bird’s family. The life span of budgies in captivity is anywhere from 5-15 years.
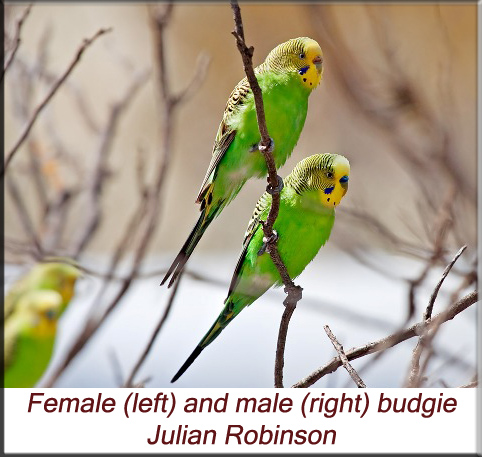
It is difficult to distinguish between young males and females, until the cere (the area on the upper part of the beak containing the bird’s nostrils) turns a distinct blue at roughly the age of 4 months for male parakeets. The female’s cere is pale brown or white, while the cere in pale pink in immature birds of both sexes.
General guidelines for hand-rearing baby Budgerigars
Hand rearing often becomes necessary when young and inexperienced parents may abandon their nests and refuse to feed baby birds. Such a situation would demand immediate intervention and you will have to care for the baby birds yourself.
Feeding and hygiene
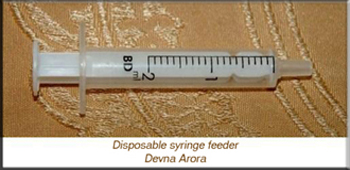
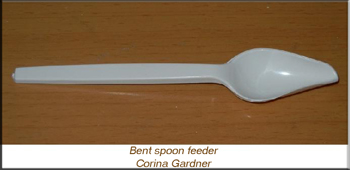
A disposable syringe, which is easily available in most medical stores, can be used for feeding the young birds. Syringe feeding is faster and less messy. However, if unavailable, then the next best alternative would be to use an eye dropper or a plastic teaspoon. Spoon feeding maybe lengthy and messy, but its ultimately beneficial as you could use thicker consistency food towards the end of the hand rearing process. The slender tip of the spoon can be dipped in boiling water and then bent make a funnel, thus making it easy to use for hand feeding.
The last option would be a crop needle (medication tube). Crop feeding is the fastest, most effective method of feeding. A piece of pipe is fitted in front of the syringe and inserted through the beak into the crop. Crop needles, should be the last option and only used by an experienced handler as it can perforate the crop if not used carefully.
Feeders should be disinfected before and after use. The feeders (spoon, syringe or dropper, or crop needle) must be rinsed with warm water to remove any feed residues. Mild soap or detergent can be used to clean spoon feeders; however, it’s very essential that it must be washed thoroughly so that no soap residue remains. Droppers, syringes and crop needles all need to be sterilized before use.
Baby food formula
Baby bird formula, for example, Kaytee Exact, available in most pet stores would be an ideal feed. However, as it is not easily available in some parts of India, baby formula like Cerelac can be used instead. To ensure that the highest levels of hygiene are maintained, only boiled water must be used to prepare the feed. Water must be boiled and then cooled before use or the formula will be too warm for the chicks.
If however, neither of these formulas is available, then a piece of bread can be crumbled in lukewarm milk and fed to the young birds - but I would only use this as a last resort. The formula must be prepared in a glass container as plastic containers tend to harbor bacteria. Never prepare formula in dirty containers. Prepare food for just one feed at a time, and always discard any leftover food.
The consistency of the formula should be similar to that of a soft pudding – neither too thick, which would make it difficult for the baby to swallow and it may choke, nor too diluted as the baby could inhale the formula into its lungs causing aspiration. The formula must only be heated adequately before feeding the baby. Formula that is too hot will scald the baby bird’s crop, causing crop burn. Crop burn is the scalding of a chick’s crop and esophagus. For the same reason, formula must never be heated in a microwave. Formula which is microwaved causes hot spots – such unevenly warmed-up food will scald the bird’s crop causing crop burn. On the other hand, formula that is cold will cause ‘sour crop’. Sour crop is a condition in which the formula in the baby’s crop has gone bad and the contents of the crop has not emptied.
Feeding instructions
The baby bird can be placed on a napkin or towel on a table or kitchen counter so you can feed the baby in a comfortable position. Our aim is to emulate the parent bird as much as possible and provide a simulated environment that is as close as possible to its natural setting. Parent birds tap on the baby bird’s beak to stimulate the feeding response. So, gently tap the bay bird’s beak with the feeding instrument in a similar manner to encourage the feeding response. The feeding response is when the baby senses food and gapes, bobbing its head up and down. Parent birds then feed their chicks by inserting their beaks at an angle, through the side of the baby’s mouth. They then regurgitate the food deep into the baby bird’s mouth. Therefore, insert the tip of the feeding syringe at an angle at either sides of the baby’s beak. Press the plunger slowly, stopping every now and then, so as to allow the baby time to swallow. The speed of feeding must never be hastened. Enough time must be allowed for the baby to swallow its food before pressing on the plunger any further.
Once its crop is full, not over-extended, and it has had enough to eat, the baby will stop gaping and refuse to open its beak. Feeding must be stopped immediately. Over feeding can cause formula to flow into the throat and down its windpipe, which can be life threatening. The baby must not be forced to feed when it is reluctant to accept food. The beak and feathers of the baby must be wiped gently with a warm, damp cloth after feeding.
The baby’s crop usually empties within 4 hours. A crop that remains full or does not empty completely within that time indicates that there is a problem. Never feed the baby while there is leftover food in the crop, instead pour a few drops of lukewarm water into the bird’s beak and gently massage the crop, NEVER press too hard. The crop is a muscular pouch near the throat of the baby bird that is used to store excess food for subsequent digestion.
Stage-wise care of the chicks
1st Week
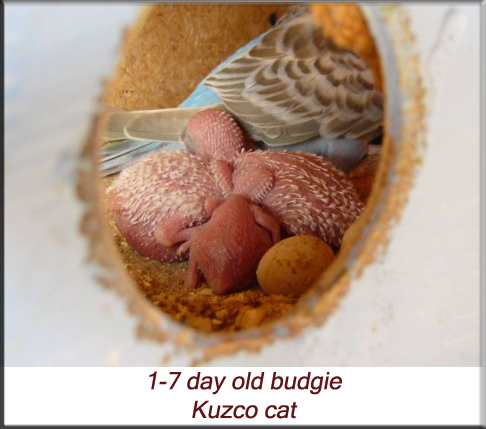
New born budgies are born pink, featherless, blind and totally helpless. The baby budgies’ peeps are a lot louder by day 5 and their movements increase. Even though their eyes are still closed, they can hold their head up by day 7. Fluffy down begins to cover the chicks in the first week of their lives.
Ideally, feeding should start at 6 a.m. and continue until midnight. The baby should be fed every 2 hours. A day old chick would require approx 1 ml of formula per feed, which can be gradually increased to 2 ml by the 4th day and 3 ml by 7th day. It is unnecessary to give the baby any additional water as they receive sufficient fluids in their feed itself. It is also unnecessary to feed the baby at night as in nature, parent birds as well as their babies sleep at night.
2nd – 3rd Week
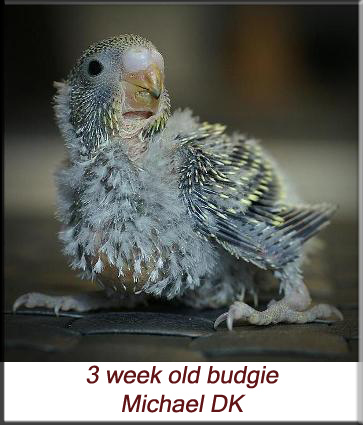
Pin feathers begin to erupt in the second week of the baby’s life & the eyes usually open around the 8th -10th day. By the 3rd week the baby is covered with down, and pin feathers and tail feathers are also visible.
By the 2nd week, the baby can be fed every 3 hours. The feed quantity must be increased to 4 ml per feed. Feeding must still begin by 6 a.m., however, the last feed could be given by 10 p.m.
The consistency of the formula can be thickened by the 3rd week and the feed quantity can progressively be increased to 5 ml per feed. The frequency of feeding can be decreased to a feed every 4-5 hrs.
4th – 5th Week
The baby birds start to develop flight feathers by this age and are now called fledglings. They also start foraging (searching for food) themselves by this age. Scatter some grain on the floor of the cage as soon as the chicks leave the nest; this encourages them to peck for themselves. Feed quantity can now be increased to 6 ml per feed and the frequency of feeds can be decreased to 2-3 feeds a day. The weaning process must begin by the time the baby is 5 weeks old.
Weaning foods such as greens, bits of toast and bread, crushed and grated boiled eggs (along with the shell) and cream cracker biscuits can now be offered to the young birds. This mixture is an easily digestible substitute and ideal during rearing of young birds. Mixed bird seeds such as millet (durra), foxtail millet (kheri), finger millet (ragi), sunflower seed, etc. should also be given to the birds.
6th – 7th Week
The young bird is quite independent now and must be transferred to a cage. Although they feed well by themselves at this age, they must be watched vigilantly to ensure they are eating well. If necessary, feedings can be continued once or twice a day for a few more days.
Once shifted to a cage, it must be ensured that the cages are spacious enough to allow free movement between perches. Perches should be placed just above the floor of the cage so that the bird can easily climb onto them. Place a shallow bowl of water at the bottom of the cage. The cage must be located in a well lighted location with a source of natural light such as sunlight, but well away from direct sunlight. Avoid exposing the birds to a cold breeze or draught, especially at night, as this causes chills and other health problems.
Fresh, natural branches of Indian lilac or neem (Azadirachta indica) and other trees should be provided as perches as this helps to keep the feet and claws of the birds healthy and strong. It not only strengthens their jaws and sharpens their beaks but keeps them occupied as well. Birds are otherwise prone to boredom and feather plucking.
It’s advisable to cover the cage with a cloth at night as it gives the bird a feeling of security.
8th- 9th Week
By 8 to 9 weeks of age, the bird should be completely weaned.
The young birds will attain their adult plumage by 3-4 months of age.
Adult bird diet
Mixed bird seed, which is available in most pet stores, should also be given to the bird. In the event that bird seed is unavailable then large millet seed (bajra), finger millet (ragi), foxtail millet (kheri), sunflower (suraj mukhi) seed, safflower (beni or kardi) seed, pumpkin (kaddu) seed (pepitas), boiled maize (makki) and soaked gram (chana) can be provided. It’s always advisable to offer the young bird’s entire or un-hulled seeds as hulled seeds tend to decay and mold.
Seeding grass, French beans, and carrots are always a welcome treat as well. Green leafy vegetables such as lettuce, mustard sprouts, millet sprouts and fenugreek (methi) leaves is essential along with other weaning foods. Cuttlebone is a good source of calcium, and also helps trim their beaks.
Foods that must be avoided
Foods that are toxic for cockatiels include apple pips, avocado (makhanphal), cherries and peaches (aadu). Never give your birds chocolate, as it may make your bird seriously ill.
Housing the young birds
A shoe-box or small cardboard box with adequate holes for ventilation, a wicker basket or even a small aquarium may be used to house the young birds. The box can be lined with a soft towel at the base and a few layers of tissue papers on top of the towel, making it easy to change the paper towels when dirty. The box must be placed in a warm, dry place, preferably near a source of warmth. A heating lamp, with a light bulb of maximum 40 watts, can be placed above the box. The lamp must be placed at least 12” away from the box. The ideal temperature for the baby birds would be about 35.5° Celsius (or 96° Fahrenheit). Again, it is crucial to be vigilant and ensure that the baby is not being overheated. A clear indication of overheating would be when the baby’s beak is open (as if panting) and wings are held away from its body. On the other hand, if it’s huddled and shivering, it is not receiving enough warmth. At night, partly cover the box with a light towel to keep out the light from the heating lamp and thus enable the baby to sleep.
It must be noted that the purpose of the lamp is to provide warmth alone, and not light, and it must never interfere with the natural light patterns and disrupt the baby bird’s sleep cycle. In nature, budgies nest in hollow tree trunks in wooded areas, where not much light enters. Even when in captivity, the parent bird sits on the baby, shielding it from most of the light.
The heating lamp may be discontinued after the baby crosses 2-3 weeks of age and is covered with its first layer of feathers. Ants are a real danger to baby birds and can fatally hurt them. It must be ensured that there are no ants in the vicinity of the bird.
Housing for breeding
Cages for breeding budgerigars should be an average size of 20”X20”X50”. The nest-box in the breeding cage should be 9”X11”X12” with a 2” opening. The nest-box can be mounted on the outside of the cage. Most cages now come equipped with a small door at the side of the cage which can be used as an entry to the nest-box. If on the other hand birds are housed in aviaries then the box can be placed inside the aviary itself. Nesting material should consist of pine shavings, shredded paper & freshly cut grass.
The female budgie lays her eggs on alternate days until the female lays about 4 or 6 eggs. Incubation occurs soon after the hen lays the 2nd egg, and the first chick hatches after 18 days. Do not disturb the parents when they are sitting on the eggs. The female rarely leaves the nest and is fed by the male. Once the chicks hatch they are fed by their parents, who bring up a thick, milky substance which forms in their crops. However, if you find that the parents are not feeding the baby and the baby is getting progressively weaker, then the only option would be that the baby would have to be removed from the nest and hand fed. Keep in mind that a newborn baby is often not fed for about the first 8 hrs of its life.
Feather care
Preening
Budgies frequently preen their feathers. Birds use their beaks to preen their feathers and keep them in good condition. Preening is an essential way for birds to keep their feathers neat and trim.
Molting
The first molt of a budgie occurs when the budgie is around three months old. Molting is a natural process when the baby feathers are replaced by brighter plumage, after the first molt the budgie molts throughout the year and loses a few feathers every now and then.
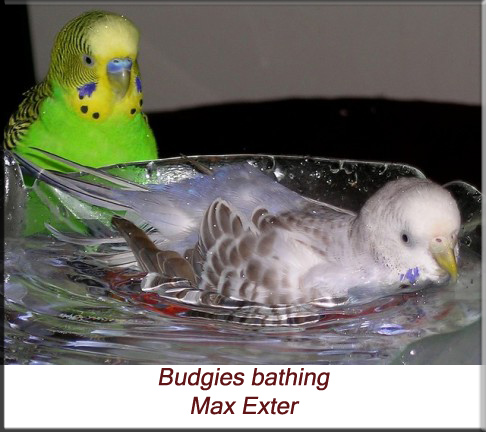
Bathing your bird
A bath once or twice a week during the summer months and once a week in the winter or monsoons should suffice. Birds that enjoy their baths would appreciate frequent opportunities to bathe, while those that don’t must not be forced. Each bird is different and some may prefer a spray of water while others may prefer a dish of water.
Spray misters or plant sprayers (plant atomizer mister) are ideal giving your bird a mist bath. The mister may be filled with warm water – hot water must never be used. Spray just above the bird’s head, so that the spray settles gently on the bird. It’s also a good practice to provide a shallow dish of water for the birds to bathe in.
Many a time you’ll find your bird flapping its wings and hanging upside down from its perch, this usually indicates that the bird wishes to bathe. Some may even sit in their water bowl or dip their head in-and-out of the bowl to indicate their wanting to bathe. You will know that he is enjoying his bath when he puffs out his feathers, raises both his wings up and away from his side and leans forward.
Signs of distress
If the budgie sits quietly with his feathers rumpled up, and you notice green watery droppings, he's probably got a chill. In the event that the bird suffers an upset stomach or diarrhea, indications of which include watery green droppings, a pinch of Ridol or Kaltin or any other binding tablet can be crushed and mixed in a half container of water and offered instead of plain drinking water. Although the bird should be better in a day or two, the medicine may be added for an additional day to ensure complete healing.
Egg binding
Egg binding is a medical condition when a female bird is unable to expel an egg. Egg binding can pose a serious threat to cockatiels. Younger females are at a greater risk of dying from egg binding. In the event that a female cockatiel is suddenly puffed-up and listless, it is quite likely due to egg-binding.
The female must immediately be placed in a small cage or shoe-box and provided with quiet and additional warmth. A heating lamp would be ideal. Castor oil or even cooking oil can be gently applied in to the birds vent or cloaca, with a Q-tip (a cotton bud) to lubricate the area and facilitate the passing of the difficult egg. One drop of castor oil given orally will also help the passage of the egg. If these basic requirements are provided it is unlikely that the bird will suffer any serious health issues.
Release of birds
Release of pet birds into the environment is just not an option. Lengthy durations of time spent in captivity can result in loss of survival capability. Hand-reared birds and ‘cage birds’ usually lack the survival capability to defend themselves and will become easy prey. And as they are vulnerable and unable to fend for themselves, they will surely be attacked and killed by other predatory birds such as hawks, kites, shikras, crows, etc. Another factor would also be locating shelter in bad weather conditions. They will also be vulnerable to other predators such as cats, snakes, rats, etc. unless they can locate for themselves a safe place to roost.
They also have a huge disadvantage competing for food. In their natural habitats, birds such as budgies, cockatiels, lovebirds, etc. forage for grain, feed on grass seeds, leaves, vegetables and fruit. Locating such food sources, especially in environments in which they are not native, would be extremely difficult. Needleless to say, this would be even more difficult in a city.
It must also be noted that the color of wild budgies is green, which gives them superb camouflage and helps them blend in with the environment. Captive-born budgies, on the other hand, are available in an array of colors from a stunning white to bright yellows and blues. These birds are so brightly colored that they completely stand out against the native fauna and easily attract the wrong attention and fall prey. Their chances for survival are therefore be extremely slim and such birds must never be released in the wild.
References
Edmund Wyndham (2006) Environment and food of the budgerigar Melopsittacus undulates. Available from:
http://onlinelibrary.wiley.com/doi/10.1111/j.1442-9993.1980.tb01231.x/abstract [Accessed: 24/06/2012]
Rob Marshall and Jean Marshall (2004) Breeding behaviour of the wild budgerigar. Available from:
http://www.birdhealth.com.au/bird/budgie/wildbudgie.html[Accessed: 24/06/2012]
Roman Tronicek and Gaby Schulemann-Maier (undated) Birds online: Everything about budgies. Available from:
http://www.birds-online.de/allgemein/australien_en.htm [Accessed: 24/06/2012]
Photographs used
Corina Gardner. Bent spoon feeder.
Devna Arora. Disposable syringe feeder.
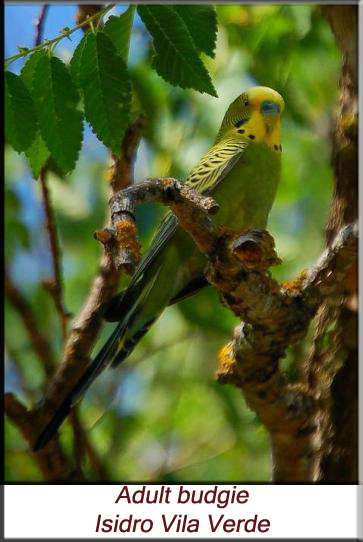
Isidro Vila Verde. Adult budgie. Available from:
http://www.flickr.com/photos/jvverde/510026697/sizes/z/in/
photostream/ [Accessed: 10/06/2012]
Julian Robinson. Female and male budgerigars. Available from:
http://www.flickr.com/photos/ozjulian/4374205181/sizes/o/in/
photostream/ [Accessed: 10/06/2012]
Julian Robinson. Wild flock of Budgerigars. Available from:
http://www.flickr.com/photos/ozjulian/4025170161/sizes/o/in/
photostream/ [Accessed: 10/06/2012]
Kutzo Cat. 1-7 day old baby. Available from:
http://www.flickr.com/photos/29320814@N03/3266883173/sizes/
o/in/photostream/ [Accessed: 15/06/2012]
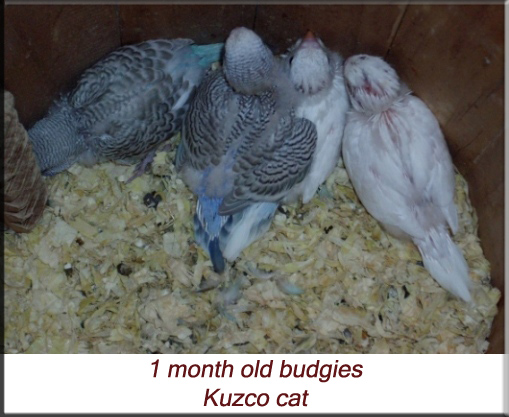
Kutzo Cat. 1 month old budgie chicks. Available from:
http://www.flickr.com/photos/29320814@N03/3421376267/sizes/
o/in/photostream/ [Accessed: 15/06/2012]
Max Exter. Budgies bathing: Available from:
http://www.flickr.com/photos/mexter/132987384/sizes/z/in/
photostream/ [Accessed: 12/06/2012]
Michael, DK. 3 week old budgie. Available from:
http://www.flickr.com/photos/michael_l/652427161/sizes/z/in/
photostream/ [Accessed: 11/06/2012]
Edited by Devna Arora
Published in 2012