


Hand-rearing and rehabilitation of bulbuls: Red-vented and Red-whiskered bulbul, continued
Ravi Jambhekar and Devna Arora
Link to Page 1: general guidelines
Stage-wise care of bulbul chicks
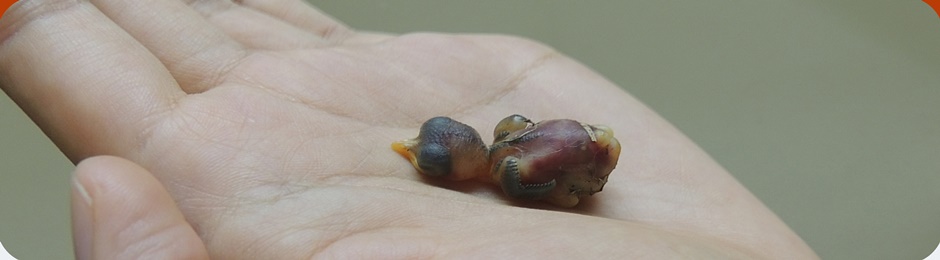
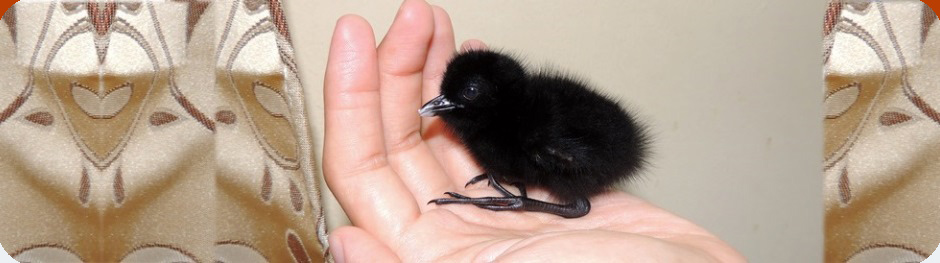
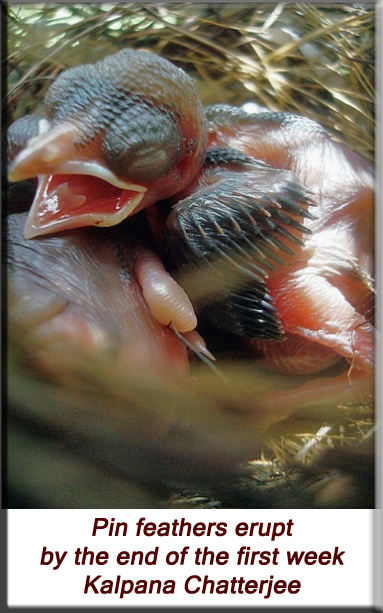
Stage 1: Nestling – unfeathered
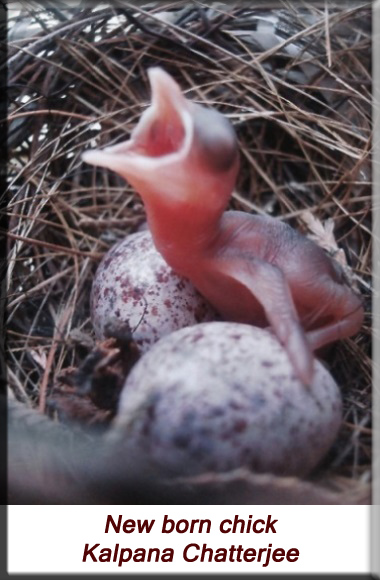
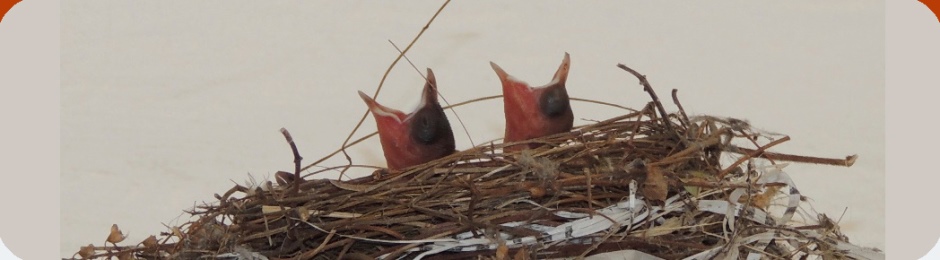
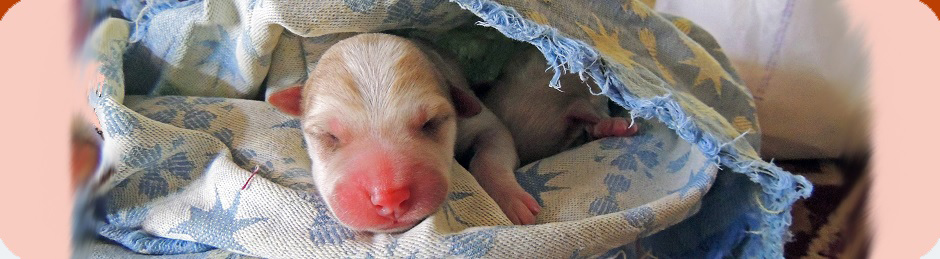
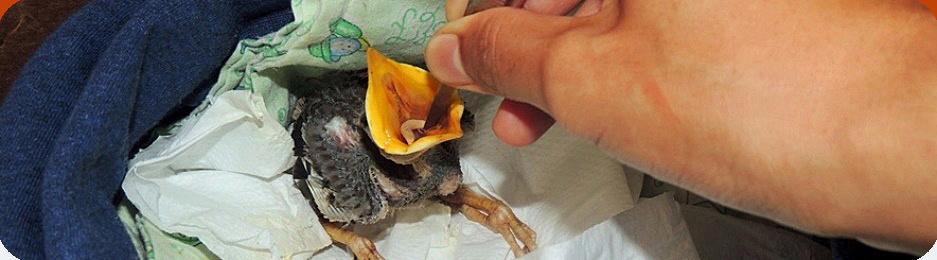
Characteristics: Bulbul chicks are born completely naked with their eyes closed and are completely dependent on their parents for warmth, food and care. Thermoregulation is poorly developed in new-born chicks and they need an external source of heat at all times. The chicks’ eyes open by the end of the first week. At the same time, the first pin feathers begin to erupt. Pin feathers rapidly erupt in the second week of the chick’s life and the chick is fairly feathered by the end of the second week.
Feed: The chicks are extremely delicate at this stage and must only be fed on soft and very easily digestible foods. The chicks are primarily fed protein-rich foods at this stage and their diet can comprise of soft boiled egg, green caterpillars and grasshoppers for the first couple of weeks of their life. [Feed only green caterpillars and grasshoppers and refrain from using hairy moth caterpillars as they can cause intense discomfort and damage.] Soft fruits like banana, chiku, melon, figs, etc. and some infant cereal, like Nestum which is without milk, too may be added to the diet.
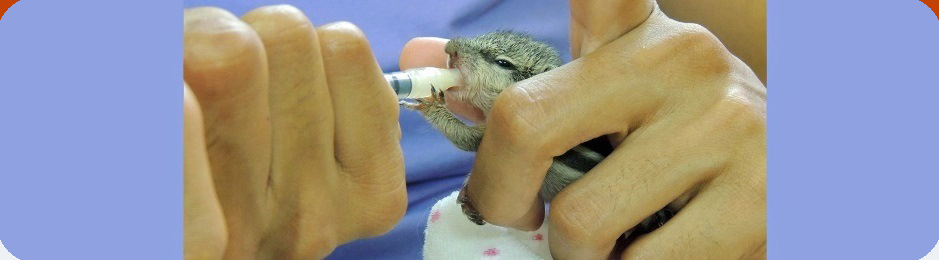
A blend of egg and infant cereal may be made for the entire day and refrigerated but skinned and pureed fruits must be added fresh to every meal. The feed may be diluted a wee bit in the first week by adding fresh squeezed fruit juices – grapes and pomegranates are excellent for the purpose. The formula, especially when offering pureed fruits, is best fed with a syringe while pieces of caterpillars and grasshoppers may simply be offered using a pair of forceps.
OOnce the chicks have settled and are accepting the feed well, ¼ drop of vitamin and calcium drops must be added to at least 2 feeds a day to begin with and gradually increasing to ¼ drop in four feeds of the day by the end of the second week. Probiotic supplements too may be added as per the chick’s requirements – a tiny pinch of powder added to 3-4 feeds should be adequate for a chick at this age.
The chicks do not require any additional water at this stage as they get the required amount through their feed. [Please refer to note on ‘Water and Hydration in the previous page for further details.]
Feeding quantity and frequency: Feeding must begin at about 6 am and continued till about 7 pm. The chicks must be fed every half hour in their first week of life and every 40-45 minutes in their second week of life.
A new-born chick may only have 0.1 ml of formula per feed, increasing to 0.2 ml of formula per feed by the end of the first week. The feed quantity would gradually increase to 0.5 ml of formula per feed by the end of the second week. Once the chick has had enough, it will cease to beg and must then be fed at the next feed. Over-feeding must always be avoided.
As a rough estimate, a chick will consume 2-3 ml of feed a day at birth and up to 4-5 ml of feed per day by the end of the first week. The daily average of feed consumed would increase to roughly 8-10 ml by the end of the second week.
Special care: Naked nestlings require additional warmth throughout the day even when housed at room temperatures. The surrounding temperature must be maintained at approximately 104˚F – 106˚F for the first week and reduced to approximately 102˚F – 104˚F in the second week of the chick’s life.
As their skin is very tender, they must be kept on soft bedding – a lining of soft cotton cloth may be preferable to paper towels at this stage. Refrain from using fleece or cotton towels.
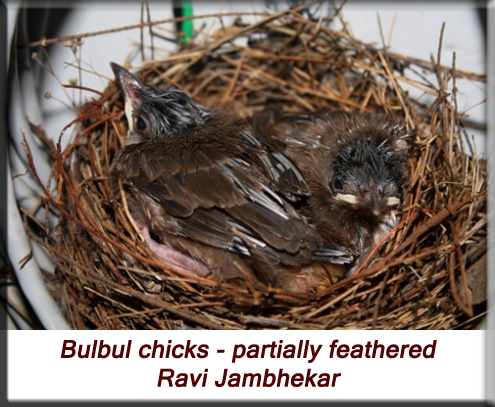
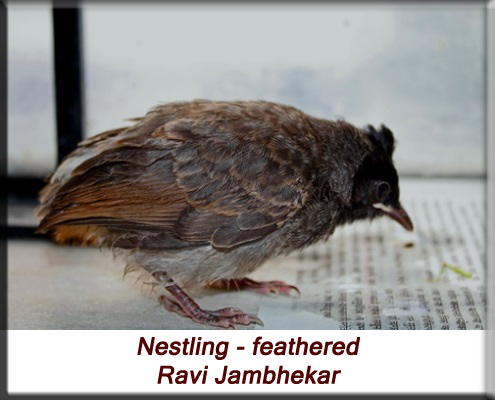
Stage 2: Nestling – feathered
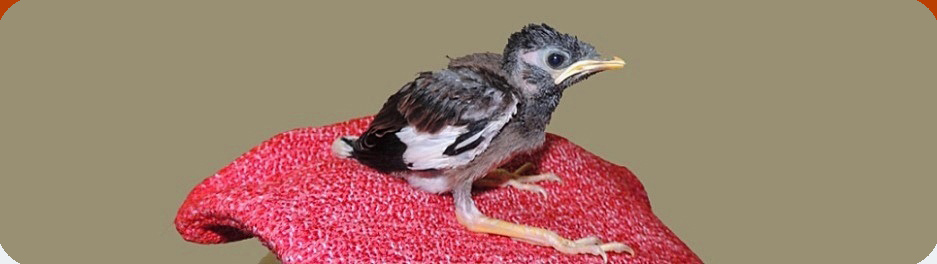
Characteristics: The chicks are adequately feathered, covering the bulk of the body, at this stage. Colour markings which are indicative of the species, become prominent at this stage. Chicks develop rather quickly now and will be ready to attempt short flights in another two weeks. The chicks are quite active and strong by this stage and begin standing on their legs by the time they are a month old.
Feed: The chicks are given a similar diet but the food proportions vary. At this stage, the protein content (eggs, green caterpillars and grasshoppers) can be reduced to about 50% of the chick’s diet, while the proportion of fruits and cereal can be increased to 50%. Infant cereals may be completely discontinued gradually. Formula must nonetheless be pureed and fed with a syringe in the 3rd week but the chicks will now start accepting mashed fruits, while slowly introducing small pieces of fruit that can be fed with a pair of forceps or by hand.
½ a drop of vitamin drops and calcium drops must be added to three feeds daily. Probiotics too may be added if required – a pinch of probiotics thrice a day should suffice each chick.
Feeding quantity and frequency: The chicks may only be fed every hour in the 3rd week and every hour to an hour and a half in the 4th week as they will now be able to consume larger quantities in one go. Feeding must begin by 7 am and continued till about 7 pm.
Special care: External heat may be discontinued during the day [on warmer days or depending upon the environmental conditions where you live] in the 3rd week but will still be required at night. The ambient temperature may be maintained at 100˚F for the chicks at this stage. Thermoregulation also develops by this age and as the chicks are now also feathered, they retain heat a lot better. External heat may be totally discontinued in the 4th week but the chicks must nevertheless be housed in warm spaces at night.
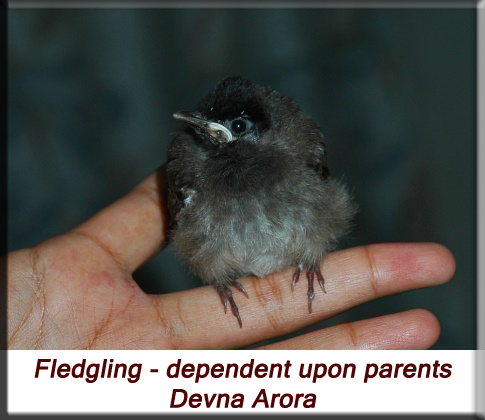
Stage 3: Fledgling – dependent upon parents
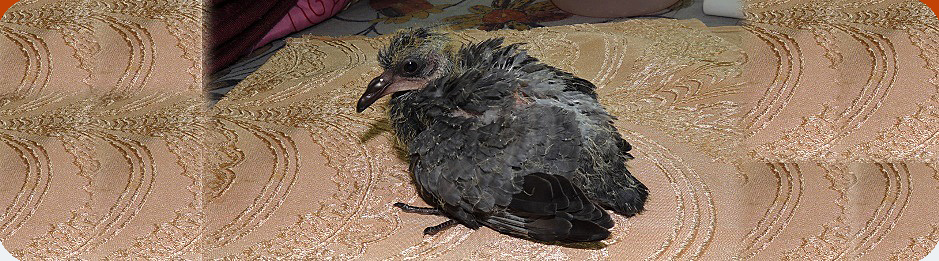
Characteristics: The chicks fledge by the time they are a month old. Flying feathers develop with speed at this age and their bodies are thickly covered in insulating feathers, making the chicks look like puffballs.
Feed: The chicks will now readily accept small cut pieces of fruit: banana, apple, chiku (sapodilla), muskmelon, figs, grapes, etc. Caterpillars may be offered whole while egg may be offered in small pieces.
Feeding quantity and frequency: A plate of chopped fruit and egg must be given to the chicks 5-6 times a day. The plate must be left before them to encourage eating on their own and fruit must be replaced every 2 hours. The chicks start feeding by themselves at this age and will be completely off hand-feeding within a few days of fledging. Intermittent hand-feeding must be continued for a week or two after fledging until they chicks are consuming an adequate quantity themselves. To encourage eating on their own, offer a plate of chopped food and draw the chick’s attention to it. To encourage independence, the plate must be offered to the chicks when they beg instead of offering pieces of fruit by hand – they learn to pick up pieces of fruit faster this way.
By the time the young birds are 6 weeks old, i.e. a couple of weeks after fledging, feeding may be reduced to 4-5 times a day. A plate of chopped fresh fruits may be offered to the birds early in the morning, mid-morning, early afternoon and late afternoon. Older birds rarely eat after 5-6 pm – they prepare to return to their roosts at this time.
Hand-feeding must have completely ceased by six weeks of age. The chicks will also not require skinned fruit anymore. In fact, they must also be offered whole fruits (i.e., complete with the skin) so they can learn to choose and eat the choicest parts on.
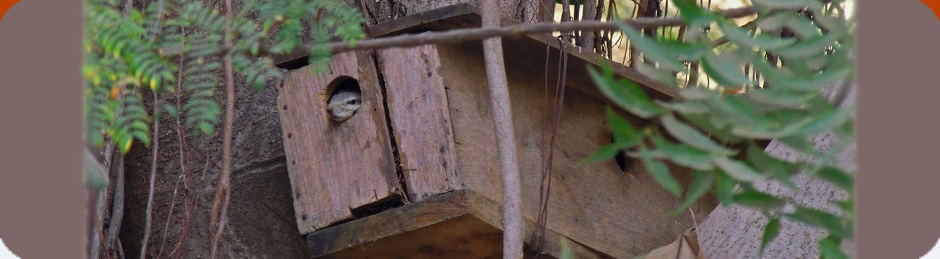
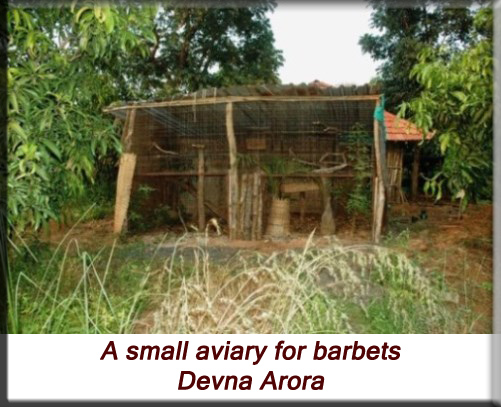
Special care: The chicks must be shifted to an aviary at this stage as they need flight practice before release. The aviaries must also have a nest box for the chicks as they may prefer to roost in the box at night. Alternatively, they may be shifted indoors for the night.
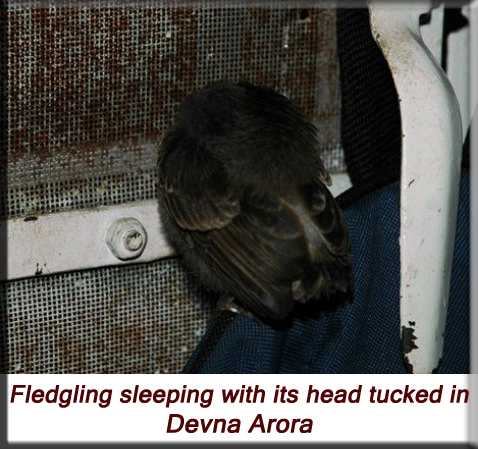
The chicks don’t require any external heat at this stage but must nonetheless be given warm roosting spaces at night, at least until a week or two after fledgling. What they essentially need is something to block off the cool breeze at night until they are a little older. Older fledglings may now be allowed to sleep in their aviaries and may even prefer to just sleep on branches instead of going into nest boxes – ensure that there are some covered branches so the chicks learn to sleep under leaf cover.
Once the chicks start to eat by themselves, they will attempt to pick up anything brightly coloured that stands out against the background. Often, they will pick up and ingest their droppings for the first few days until they are able to distinguish between their dropping and actual food. Droppings must be picked up frequently to prevent this.
A bowl of fresh water must also now be available for the chicks at all times as they will now start drinking water. It is also a good idea to offer a big and shallow bowl of water for the birds to bathe in – they will certainly enjoy it during the summer months.
Stage 4: Fledgling – independent
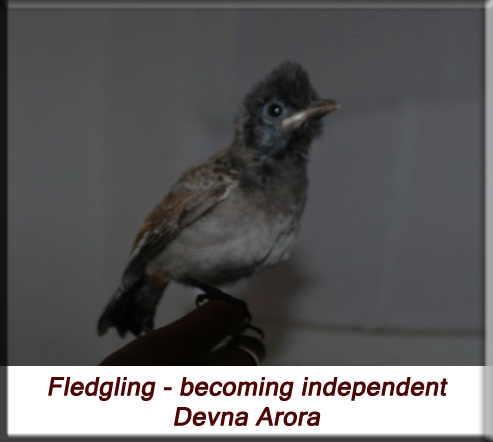
Characteristics: The chicks are fairly self-sufficient at this stage. Primary flying feathers will have erupted by this stage and the chicks will have lost the excess nestling weight.
Feeding: The chicks will now consume an adult diet and must be given an assortment of foods. Wild picked berries and fruit must now be introduced to their diet – this helps them familiarize with the foods available in the wild. Fresh food and water must be available for them at all times.
The birds must be offered a combination of whole fruit and some chopped fruit pieces. The whole fruit encourages the birds to learn to peck small pieces out of whole fruit as they will consume many fruits that cannot be swallowed whole.
Special care: The chicks are now completely independent and must be readied for release. The process of soft release begins at 16 weeks of age.
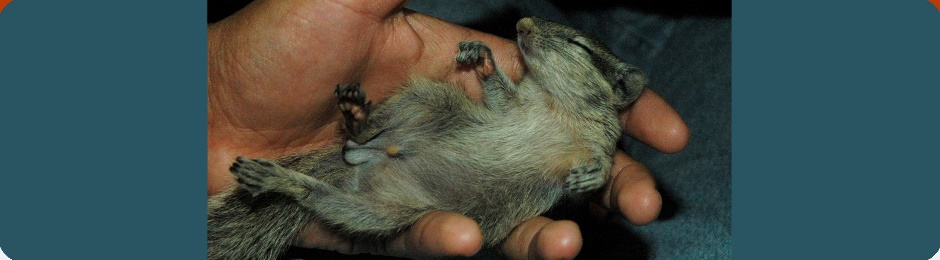
Stage 5: Sub-adult/Immature
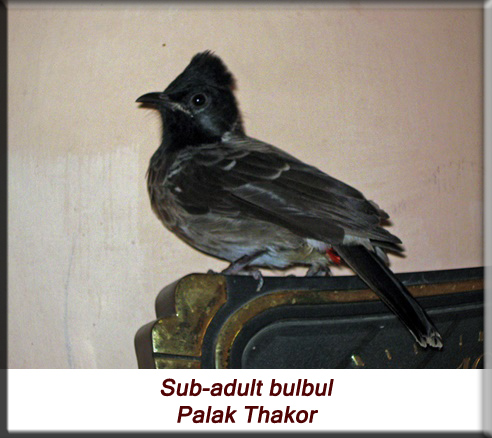
The chicks will have undergone their first moult and will have their adult feathers by six months of age. Adult colour makings also start to appear now. The chicks must have undergone rehabilitation by this stage. If opting for a hard release, this is the right time to release them.
Stage 6: Adult birds
Adult bulbuls will be completely independent and should have completely stopped returning to the aviary. They will breed in the following season.
Rehabilitation and Release
The young birds must be must be shifted to an aviary at the time of fledging and given adequate flight exercise before release. This is essential for them to develop the agility and swiftness required for survival. The aviary must be at least partially sheltered so the birds are not exposed to harsh sunlight throughout the day. Food at this stage must not be offered in one place but scattered around throughout the day so the young birds learn to search for it. Care must be taken to prevent the chicks from flying into the mesh and injuring themselves. Fresh drinking water and a larger shallow bowl of water to bathe in must be available at all times. The aviary must also have a couple of nest boxes, hung higher in the aviary, for the young birds to roost in.
The first step towards getting your bird ready for release is to break the young bird’s dependency on human beings and to give it maximum opportunities to be tuned in to its natural instincts. The process of rehabilitation must actively start by the time the chick fledges and followed meticulously until release.
Important things to be kept in mind when releasing bulbuls
1. Place of release and the prevailing environmental conditions
Wherever possible, all rescued animals must be released where they have been picked up from. This is particularly important when releasing animals that had been admitted to care centres as adults so they can have the chance to go back to familiar and known spaces. Younger birds must be released in suitable locations with good tree cover and ample fruiting trees, and in locations where they will be easy to monitor for the first few days after release.
The only instance where release to the same location must be avoided is if there have been irreversible changes which led to the initial displacement of the birds in the first place and will have rendered the place unsuitable for the survival of the species.
2. Age and timing of release
Birds that have been admitted as sub-adults or adults may be released just as soon as they are ready to be released. The only consideration for them is fitness for survival.
Birds that have hand-raised, on the other hand, need to go through a more protective method of release. Young birds may be released at the age of about 2½ - 3 months when opting for a soft release whereas those that are being hard released must only be released after 4-6 months of age.
3. Method of release
Birds may be released by following protocols for either a soft release, which is most ideal and recommended for hand-raised young, or through a hard release.
Hard Release is a means by which the animal is released into a new location without its being accustomed to the new environment. This process is appropriate for bulbuls that have been taken into care as adults.
Soft Release is a means by which the animal is gradually introduced or familiarized to a new environment before its release into that location. Hand-raised animals are at a disadvantage of not having had adequate parental learning and require additional safety and protection during release; hence the ideal way to release them is through a process of soft release.
The simplest way to soft release a bulbul is by allowing it to fly in-and-out of its enclosure for the first few weeks after it fledges and becomes fairly independent. The young must be shifted to enclosures where they will be released from so that they can identify the enclosure and their surroundings – this will help in building site fidelity and make it easier for them to return to the safety of the enclosure until they are completely independent and ready to leave. The young birds may be allowed to fly out in a few weeks thereafter through a couple of openings/windows in their enclosures. At this age, the birds will not fly far and return to their enclosure several times during the day and most certainly to roost at night. The access opening and windows must only be opened at dawn and closed at night to prevent entry of predators like rats, cats, snakes, etc.
Once they have explored their surroundings and have found safe roosting spaces for themselves (typically in a few weeks), they will cease to return to the protection of their aviary but may return for titbits of food. Eventually, they will become completely independent and cease to return to the aviary at all. Supplemental feeding must be continued until the birds are independent but may be ceased once the birds are self-sufficient.
BBirds may be released in a similar manner if hand-raising and rehabbing from home. Consider a small cagey extension out of any room or window – this system works best in apartment buildings. The extension may simply be a light frame with wire mesh if there is no threat of cats – this is inexpensive and very easy to install. The extension below has been used successfully and the birds were periodically let in the room to exercise their wings.

Experience suggests that birds released from homes return for longer durations as they may have stronger bonds with both the homes and the caregivers. They are also known to visit every now and then well after the gain complete independence. Do refrain from encouraging the birds to enter the house if the birds visit you. Birds that are accustomed to entering the house are twice as likely to accidentally fly into someone else’s house and land into trouble.
Note of caution: A ceiling fan must never be used in a room with birds to ensure they don’t fly into a moving fan and get injured fatally.
Acknowledgements
We sincerely thank Kalpana Chatterjee, Parthiv Patel and Palak Thakor for the permissions to use their photographs of the bulbul chicks.
Photographs used
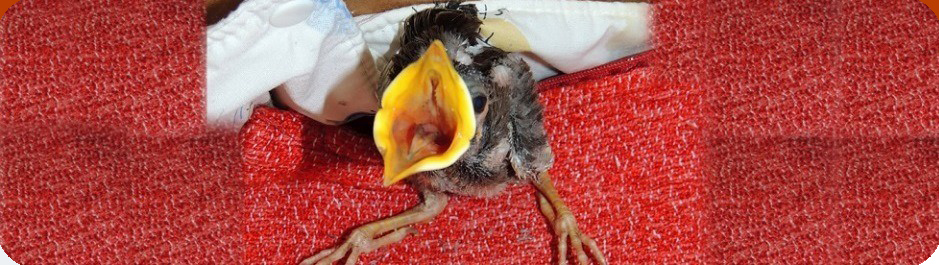
Kalpana Chatterjee – Nestlings begging for food. Available from: http://www.flickr.com/photos/kalsnchats/3781656324/
Kalpana Chatterjee – New born chick. Available from: http://www.flickr.com/photos/kalsnchats/3781649314/
Kalpana Chatterjee – Pin feathers erupt by the end of the week. Available from: http://www.flickr.com/photos/kalsnchats/3781658228/
Palak Thakor – Sub-adult bulbul
Parthiv Patel – Bulbul with babies in the nest. Available from: http://www.flickr.com/photos/parthivpatel/3972443794/in/photostream/
References and further reading
Baker, E.C.S. (1922) The Fauna of British India, including Ceylon and Burma: Birds – Vol. I (II Ed.), Taylor and Francis, London, pp. 383–389, 394-397
Please note: This document is targeted at hand-rearing alone and does not address or substitute any veterinary procedures. For any medical concerns, please consult your veterinarian at the earliest.
For amateurs or people handling new born chicks for the very first time, please keep in touch with a trained and experienced hand for guidance and regular progress updates.
Protocol published in 2013
